This website has been happily running on Github Pages for quite some time now. And to be honest I’ve never experienced any issues with that service. Also their pricing is pretty awesome, you can’t beat free, right?! ;-). This is a very simple static website which uses Hugo as the site generator. Anyway, I’m moving this blog over to Amazon AWS so that I have an actual “workload” (yes, I like using big words) to work with in order to get some more hands-on experience in using Amazon AWS services. This also means I will opt for Amazon AWS services even when there might be better or free options available, so please bare that in mind!
This post describes the rationale as well as the process of setting up the Amazon AWS services and any modifications to the website configuration.
Overview
- Register a domain name with Route53.
- Setup S3 for hosting our static website content.
- Request a SSL certificate to use with the website using Certificate Manager.
- Configure CloudFront to optimize site performance (CDN) and security (SSL).
- Setup your DNS zone configuration using Route53.
- Upload and test your website.
1. Register a domain name
If you already have a Route 53 hosted domain name to use with the website you can skip this section and proceed to the next paragraph (2). Ofcourse it’s possible to use other DNS hosting solutions to make this work but that’s really beyond the scope of this post. Remember, I want to leverage Amazon AWS services as much as possible to gain experience with the platform.
-
Login to the Amazon AWS Console. This post will not describe how to create and setup a AWS account; but please don’t forget to setup (Multi-Factor) MFA authentication for your account.
-
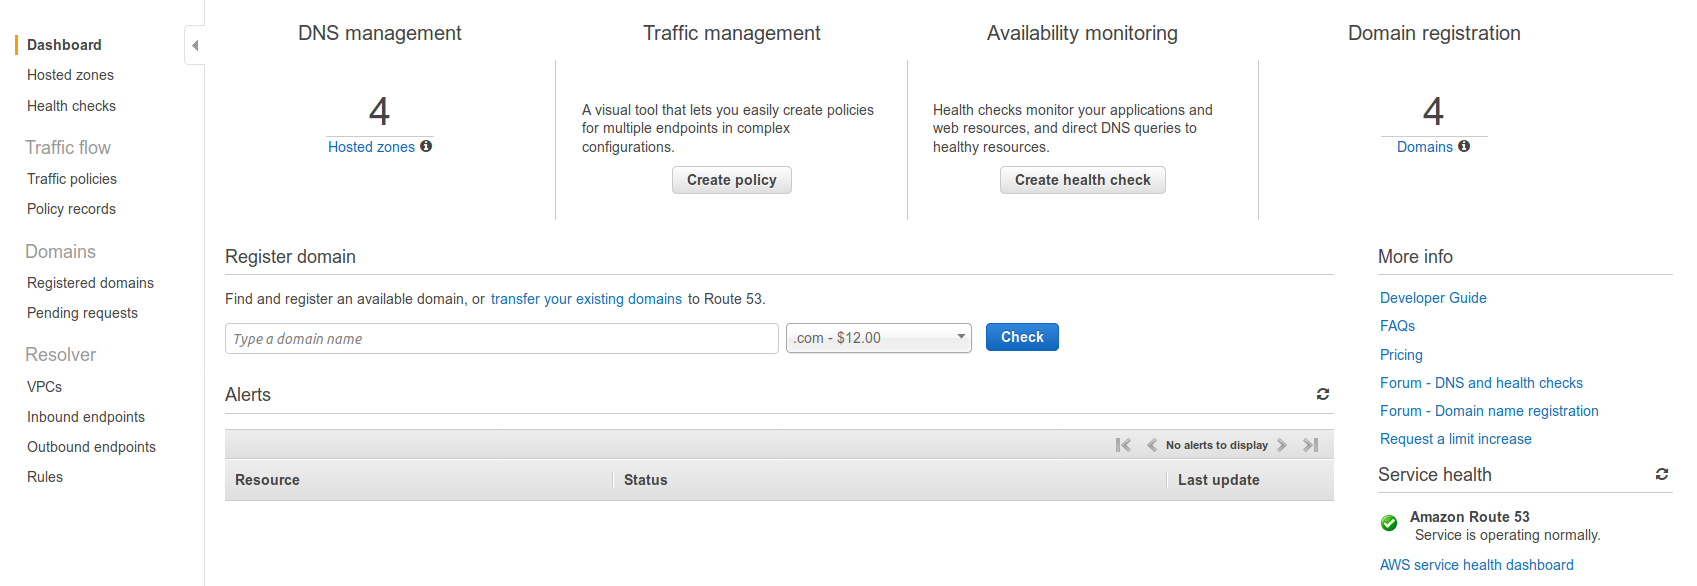
Select Route 53 from the Services dropdown, since there are a lot of services available I find myself using the search function most of the time. The Route 53 landing page should resemble this:
-
From the navigation menu on the left select Registered domains which leads you to an overview of all domains currently registered through AWS.
-
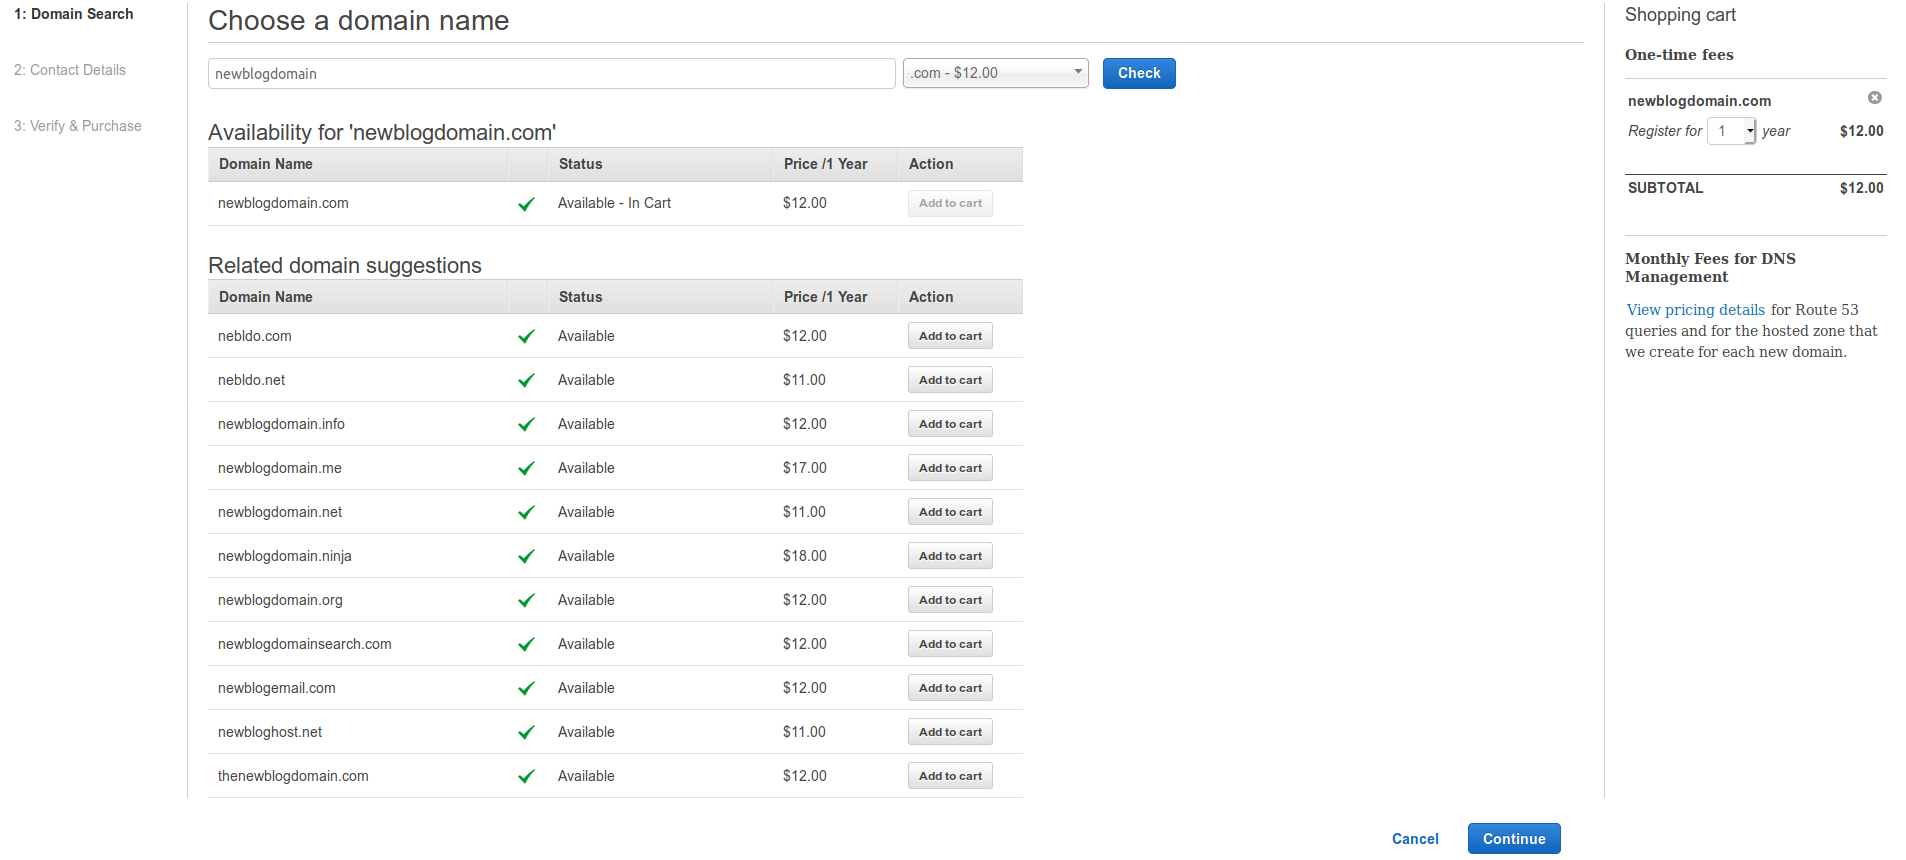
And now the hardest part; register a cool domain name! You can use the text input field and the domain selector to check if you’re desired domain name is still available. When you’ve found a free and cool domain name add it to the cart and continue to the Contact Details form. Please make sure to enable Privacy Protection option if available for your domain, this feature hides some personal information that would’ve otherwise been publically available. Finally, verify and purchase the domain and you’re ready to proceed to the next section!
2. Setup static website hosting
Now that we have a domain name to use with our website it’s time to setup some sort of web service. We could use a traditional approach by deploying a VM (EC2) and configure webserver software like Apache or NGINX; but i really (really!) don’t want to bother with servers, load balancers, scaling, software configurations, backups, etc, etc. The solution for this is Amazon S3 it provides a nice and simple service which provides automatic scaling, data replication (99.999999999% durability!) and can handle basically any amount of traffic you throw at it.
-
Select S3 from the Services dropdown, the S3 landing page looks something like this:
-
For our purpose we want to setup a publicly available S3 bucket to hold our static webite content. Recently Amazon has added multiple layers of protection so that it’s impossible to create S3 buckets by accident. The first level of protection is on the account level; we need to setup our account to allow for public S3 buckets. On the landing page click Public access settings for this account in the navigation page, by default all measures are set to True (enabled). Now click Edit and uncheck all checkboxes and hit the Save button.
-
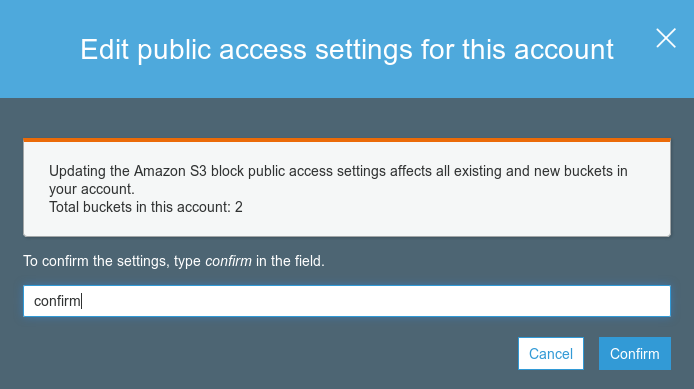
Confirm these changes by typing confirm, then hit the Confirm button. We have now enabled our account to setup publicly available S3 buckets! It’s now time to setup our bucket.
-
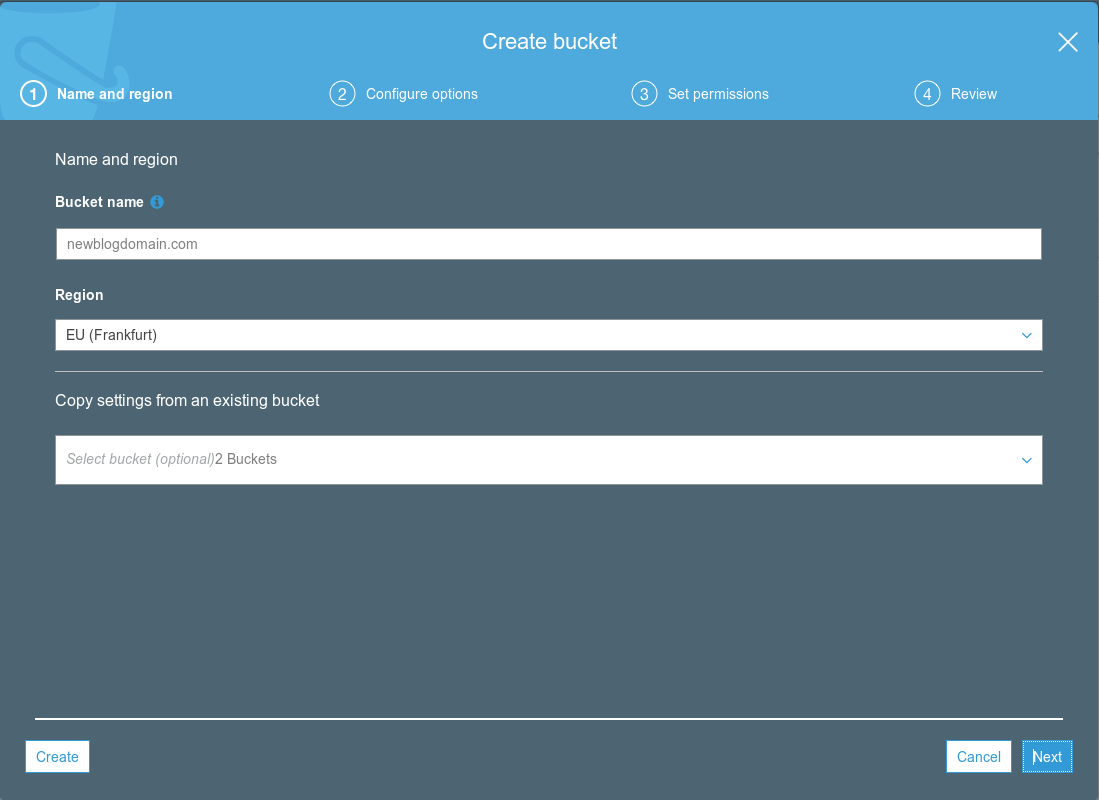
Navigate to the Buckets overview. Select Create bucket and use your (fully qualified) domain name as the name for this bucket. It’s also possible to use a subdomain for the site, e.g. “blog.newblogdomain.com”. Please consider the Region where to create the bucket. Since the default settings are perfectly fine for this new bucket you can hit Create instead of going through the wizard.
-
You’re automatically redirected back to the S3 landing page after bucket creation, your new bucket should be visible in the overview instantly. If you check the Access column you’ll see that the bucket is marked as Bucket and objects not public. We now need to setup the bucket itself to be publicly available. Go into your bucket by clicking on the Bucket name and then navigate to the Permissions tab. Here you’ll see that all the public access settings are enabled, this is the second layer of protection.
-
To enable public access click on Edit and then uncheck all checkboxes and hit the Save button. Finally enter confirm and hit the Confirm button. We now have enabled the bucket for public access! When you go back to the Buckets overview you’ll now see in the Access column that Objects can be public, now we need to configure a bucket policy.
-
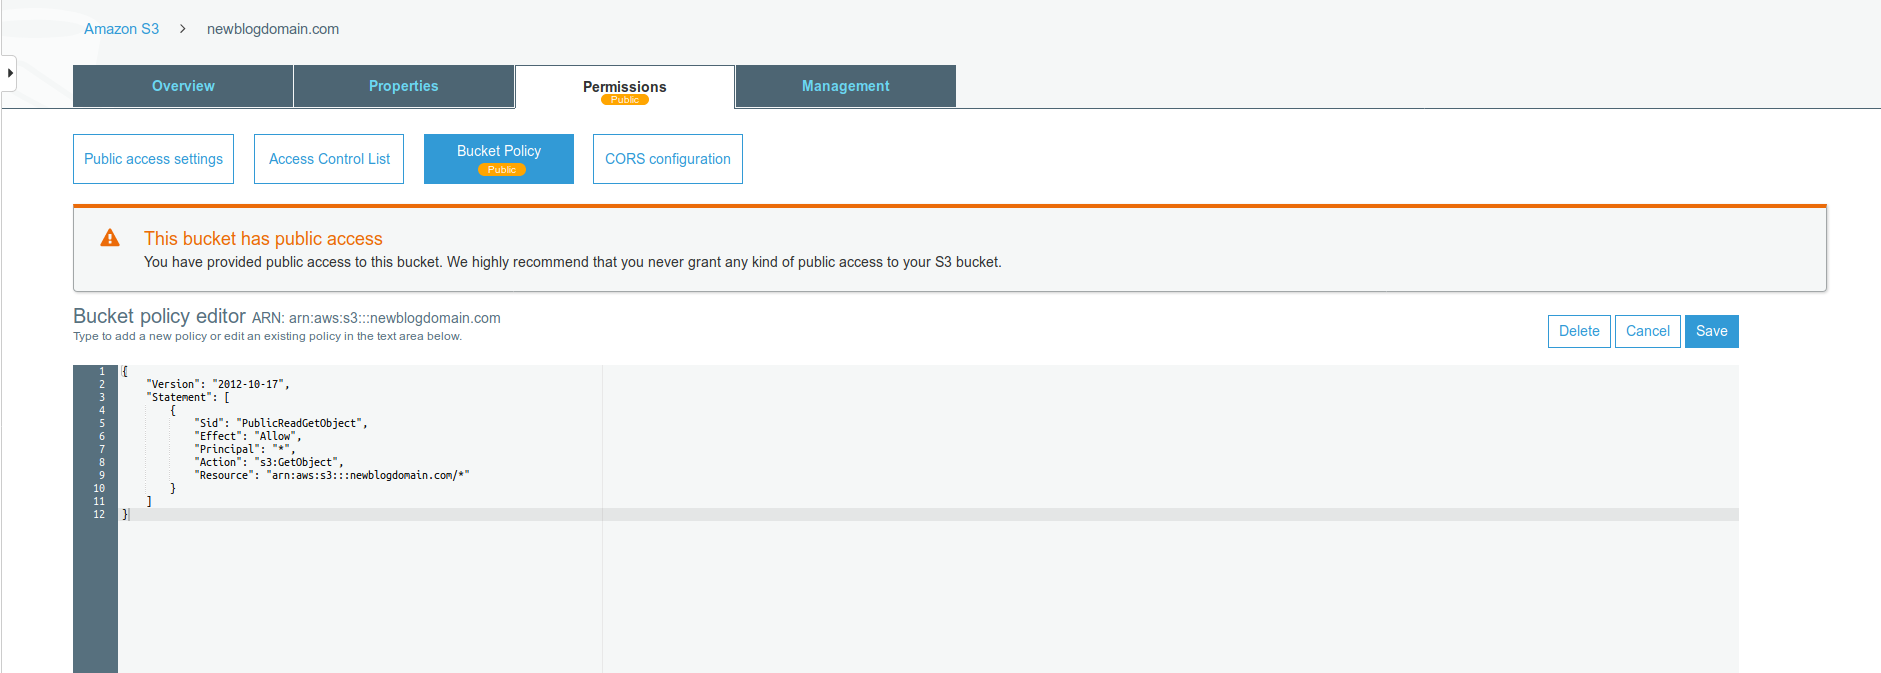
Enter the bucket by clicking the Bucket name, then select the Permissions tab and hit the Bucket Policy button. This will open the bucket policy editor which allows you to type/paste S3 policy statements in JSON. You should take note of the Amazon Resource Name (ARN) of your bucket as you have to use it in the policy, copy the following JSON into the editor and change the ARN to reflect your resource.
{
    "Version": "2012-10-17",
    "Statement": [
        {
            "Sid": "PublicReadGetObject",
            "Effect": "Allow",
            "Principal": "*",
            "Action": "s3:GetObject",
            "Resource": "arn:aws:s3:::newblogdomain.com/*"
        }
    ]
}-
When done hit the Save button, you can see your bucket is now clearly marked as Public.
-
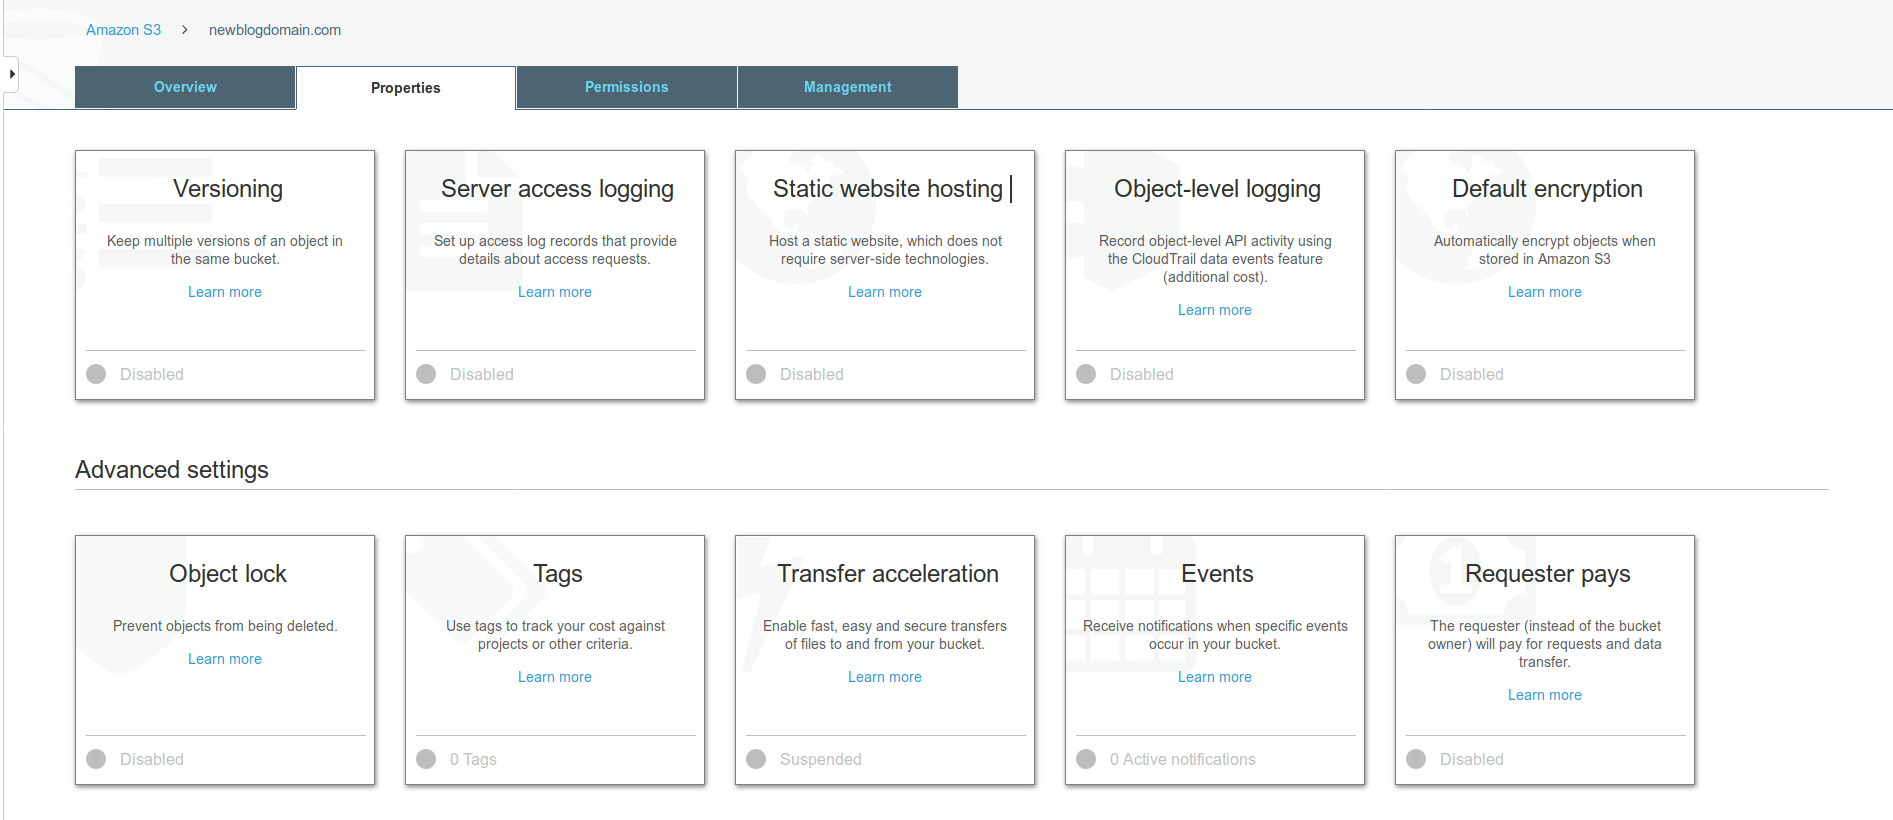
So we now have a public S3 bucket. The next thing to do is to enable the website hosting feature on this bucket. Navigate to the Properties tab to get an overview of all the available features on S3. Most features incur an extra cost and are not required at this time, so we will ignore them for now :-).
-
Next, select Static website hosting, then select Use this bucket to host a website and setup your index and error documents. Hit Save when done! Finally, copy the endpoint URL, this is the web address for your bucket, and paste that into a new browser tab. You should get a 404 error (NoSuchKey) as you haven’t uploaded any website yet!
3. Request SSL certificate
We now have a fancy new domain name and a place to host our website files, the next step is to request a SSL certificate for our new domain and website. Luckily Amazon AWS provides the Amazon Certificate Manager (ACM) which provides FREE SSL certificates for use within Amazon AWS.
-
From the Services dropdown select Certificate Manager.
-
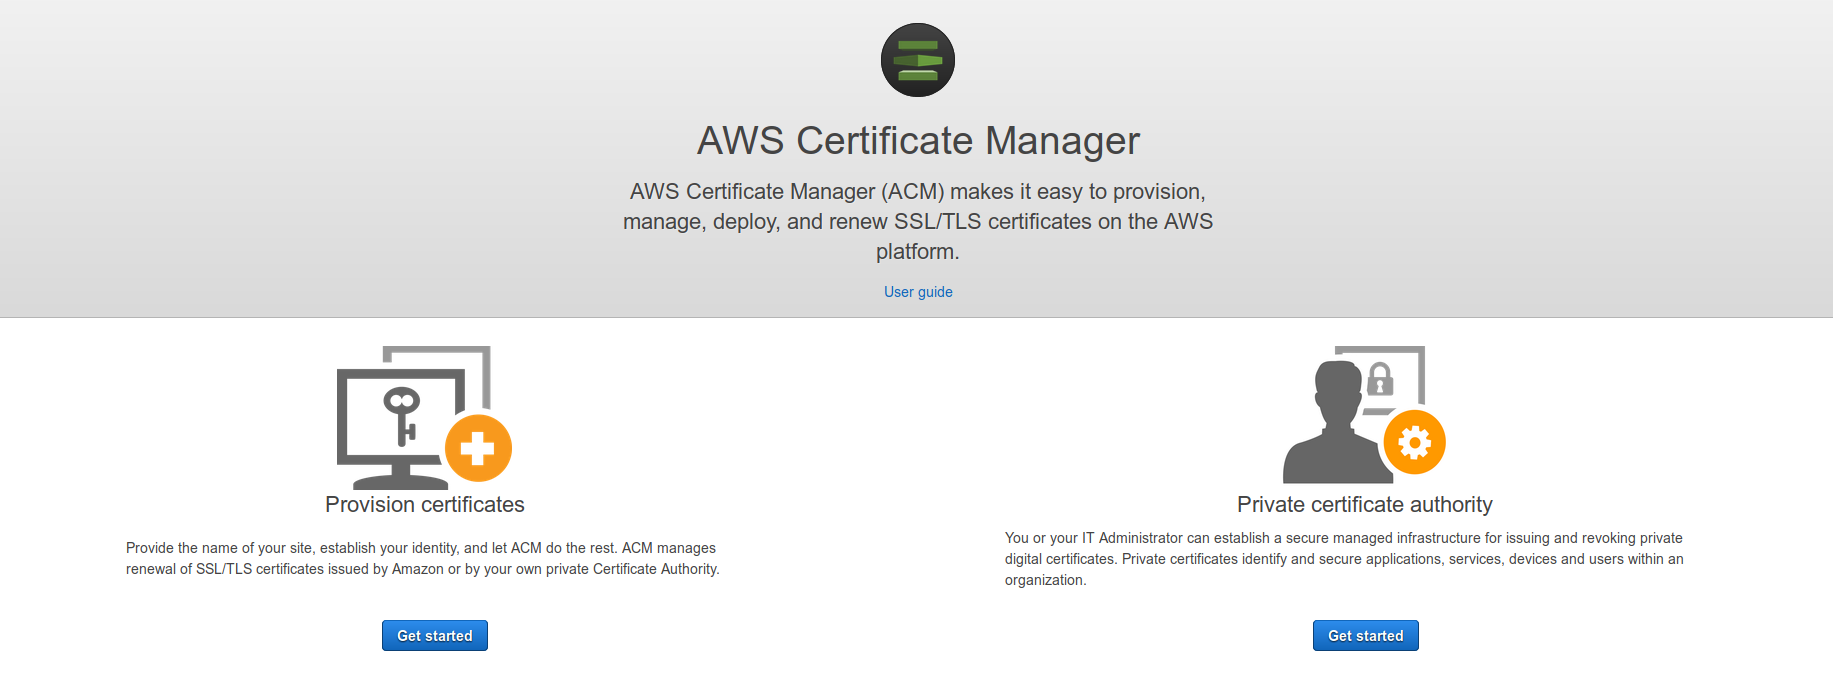
Like most AWS resources, certificates in ACM are regional resources. To use an ACM Certificate with Amazon CloudFront (which will be discussed later), you must request or import the certificate in the US East (N. Virginia) region. ACM Certificates in this region that are associated with a CloudFront distribution are distributed to all the geographic locations configured for that distribution. So switch to the US East (N. Virginia) region by using the region dropdown (top right of your screen). On the landing page hit the get Get started button in the Provision certificates section.
-
On the landing page hit the get Get started button in the Provision certificates section.
-
This will start the wizard where the Request a public certificate is pre-selected for you, now click Request a certificate.
-
The next step is to add the domain name(s) that will be tied to this certificate. I recommend to add the naked domain name, in this example “newblogdomain.com”. And for maximum flexibility in the future also add a wildcard domain name: “*.newblogdomain.com”. The wildcard record allows you to use custom hostnames with this certificate, e.g. “blog.newblogdomain.com”, etc. When done hiy Next.
-
Now Amazon MUST verify if we really own the domain name(s) that we’ve specified in the certificate request, it currently supports two medthods for this; 1) through DNS and 2) via Email. Since we have registered this domain name through Amazon (Route 53) the easiest option here is to have Amazon verify domain ownership through DNS, so select the DNS validation option and hit Next.
-
On the review page check once again you’ve made no errors/typos then hit the Confirm and request button. The actual validation process takes some time, don’t wait for it… Go get some coffee!
4. Setup CDN & SSL
We now have a domain name, a location for website content and a SSL certificate, we now only need to bring these items together into a working solution. SSL certificates can only be assigned to CloudFront distributions, this step describes how to setup CloudFront for our simple, but SSL protected, website.
-
From the Services dropdown select the CloudFront service. This will bring you to the CloudFront getting started page, just hit Create Distribution to get started!
-
The first choice to make is the distribution type, since we’re not streaming pr0n^Hvideo select the Web distribution type.
-
In the Origin Settings section you configure where the original website content, hence the name origin, is located. This should point to our S3 bucket, but you have to specifiy the HTTP endpoint of the bucket (static webhosting) and not the API endpoint. This means that you need to paste the bucket address into the field (get that URL from the S3 static website hosting option), for this example the URL is “newblogdomain.com.s3-website-eu-west-1.amazonaws.com”. Yours should resemble that, please take note of s3-website in the URL. Again, do not select the bucket from the pulldown list!
-
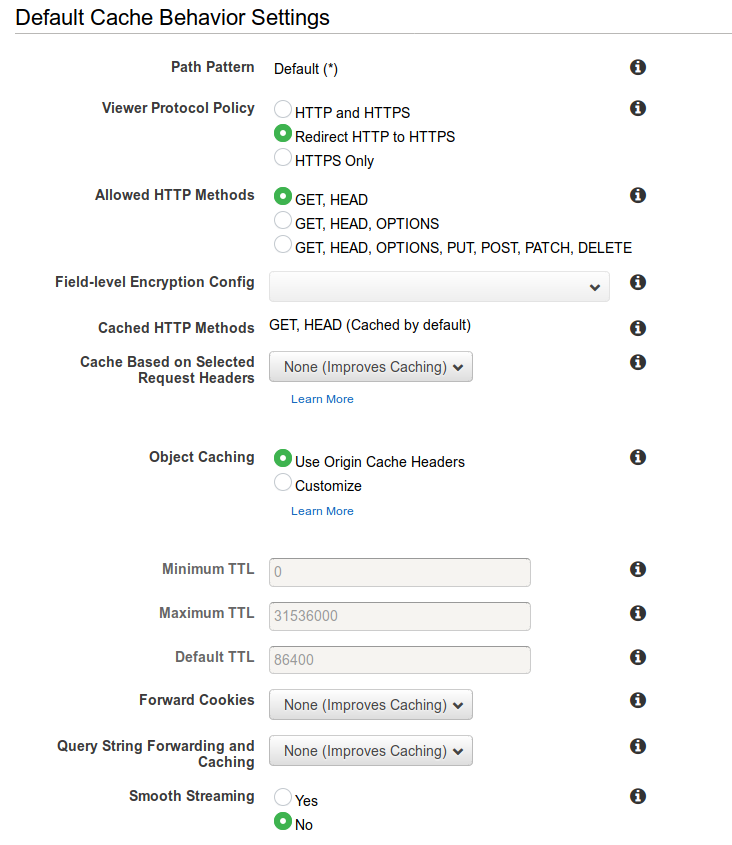
In the Default Cache Behavior Settings section change the Viewer Protocol Policy value to Redirect HTTP to HTTPS. You can review all other settings but I’m leaving them set to their defaults.
-
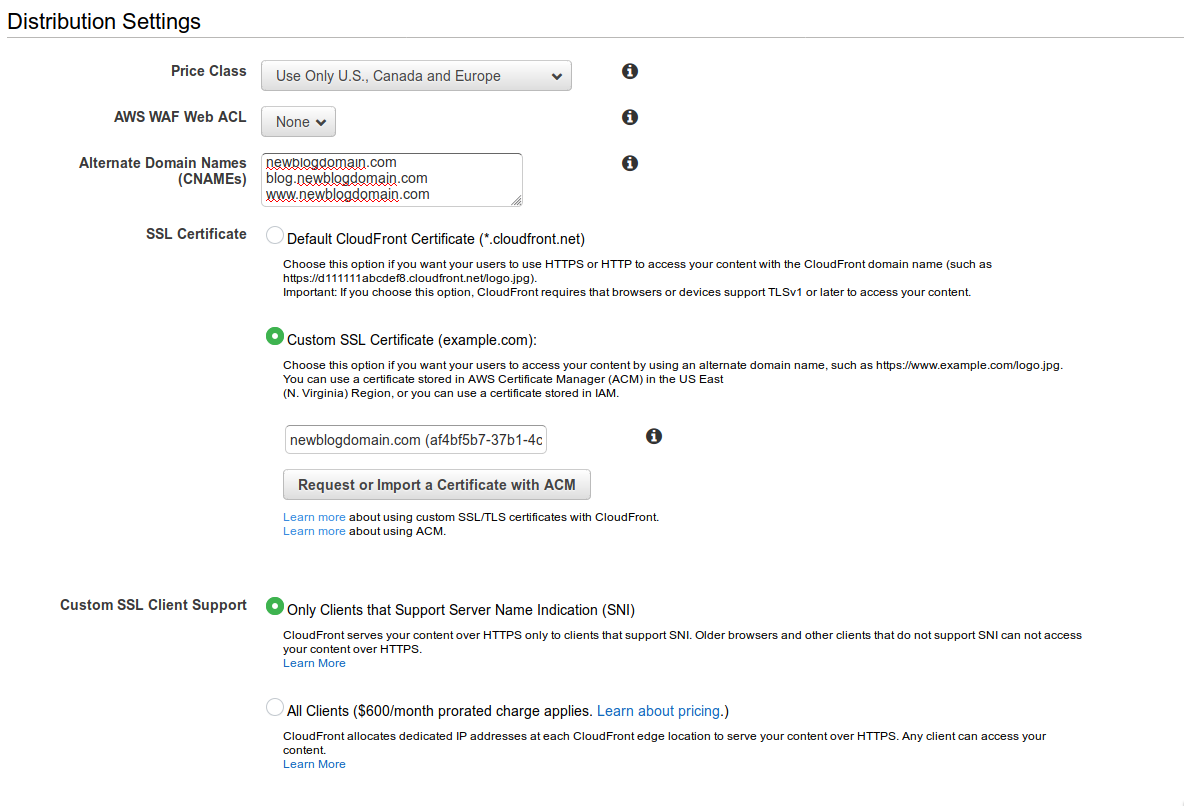
In the Distribution Section section you can configure settings related to the amount of Edge Locations to use (Price Class), WAF, CNAMES, SSL certificates and several SSL client options. First of all the Price Class dictates how many Edge Locations are provisioned in your CloudFront Distribution. Remember there are costs associated with this option, I settled on Use Only US, Canada and Europe as that covers my use-case nicely. In the Alternate Domain Names setting you must speciffy ALL domain names that you want your website to be accessible from. At the bare minimum you setup only your naked domain name, e.g. “newblogdomain.com”, I recommend adding also the “wwww.newblogdomain.com” alias as a lot of users assume that to be present/working. Then set the SSL Certificate option to Custom SSL Certificate and select your certificate from the pulldown. Check and verify that you did set the Custom SSL CLient Support to Only Clients that Support Server Name Identification (SNI), the other option is quite expensive!
-
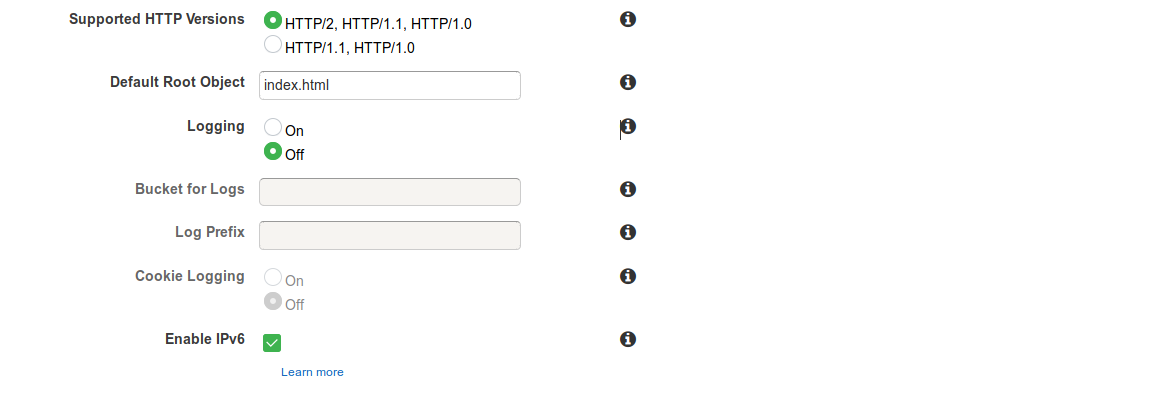
Another important but easily overlooked setting is the Default Root Object, this setting directs CloudFront to return a specific object (the default root object) when a users requests the root URL for your web distribution instead of directly requesting an object in your distribution. Specifying a default root object lets you avoid exposing the contents of your distribution. Since we’re dealing with static website hosting here set the Default Root Object to index.html.
-
Finally, hit Create Distribution
-
Go back to the Distributions overview and watch the Status of the CDN privisioning process. This really is a lengthy process, so go make a pizza or something ;-).
Note: if you keep getting browser errors related to cipher suites you most likely did not setup the Alternate Domain Names option correctly!
5. Setup DNS
The final piece of the puzzle regarding the AWS infrastructure involved with hosting our website is to direct user traffic towards our CloudFront Distribution. For this we need to make some modifications to the DNS zone configuration for our domain name, here we go!
-
From the Services dropdown select the Route 53 service.
-
From the Route 53 landing page click through on the Hosted zones navigation pane which provides an overview of all your registered / hosted domains. Click on the domain name that you want to use with the new website to enter the zone configuration editor. Since I did not really register the “newblogdomain.com” domain, I’ll show you how the zone configuration for my domain looks like.
-
Now we need to setup some DNS records, which are called Record Sets in Amazon AWS newspeak. So hit the Create Record Set button to add a new record. Generally speaking it’s a good idea to add a record for the root domain name (also called APEX domain name). In the Create Record Set dialogue enter the following information to create, when done hit the Create button.
| Field | Value |
|---|---|
| Name | empty |
| Type | A - IPv4 address |
| Alias | Yes |
| Alias Target | Click in the textfield and select the corresponding CloudFront Distribution, e.g. “newblogdomain.com” (xxxxxxx.cloudfront.net) |
- I think it’s good practice to also add a www record, it’s something a lot of people still assume to be present. Use the same method as for the APEX domain name.
| Field | Value |
|---|---|
| Name | www |
| Type | A - IPv4 address |
| Alias | Yes |
| Alias Target | Click in the textfield and select the corresponding CloudFront Distribution, e.g. “www.newblogdomain.com” (xxxxxxx.cloudfront.net) |
-
After adding these records your zone configuration should resemble mine, so check that now! Please don’t get confused by any additional records in my zone (MX, SPF, TXT) as these are involved with my hosted email service (Google).
-
Because we have created new DNS records we don’t have to wait for DNS propagation to finish and can test these new records immediately. Drop into a shell / terminal and use the nslookup command which is often available by default on Windows, Linux and MacOS. You can see your records resolve to multiple IP addresses, that’s Amazon’s High Availability features at work for you!
jorgen@mainframe:~$ nslookup newblogdomain.com
Server:		127.0.0.53
Address:	127.0.0.53#53

Non-authoritative answer:
Name:	newblogdomain.com
Address: 52.85.245.67
Name:	newblogdomain.com
Address: 52.85.245.129
Name:	newblogdomain.com
Address: 52.85.245.239
Name:	newblogdomain.com
Address: 52.85.245.180

jorgen@mainframe:~$ nslookup www.newblogdomain.com
Server:		127.0.0.53
Address:	127.0.0.53#53

Non-authoritative answer:
Name:	www.newblogdomain.com
Address: 52.85.245.239
Name:	www.newblogdomain.com
Address: 52.85.245.67
Name:	www.newblogdomain.com
Address: 52.85.245.180
Name:	www.newblogdomain.com
Address: 52.85.245.129

jorgen@mainframe:~$
6. Upload and test your website
Finally we’re done setting up all AWS services involved with hosting our static website. What remains is to create and upload a webpage so that we can functionally test it!
- For testing purposes I always create a simple index.html file from the command-line. Remember that the name of this file has to correspond to the Default Root Object in CloudFront and the Index Document in S3.
jorgen@mainframe:~$ echo "<html><body><h1>Welcome to my newblogdomain.com test page</h1></body></html>" > index.html
jorgen@mainframe:~$-
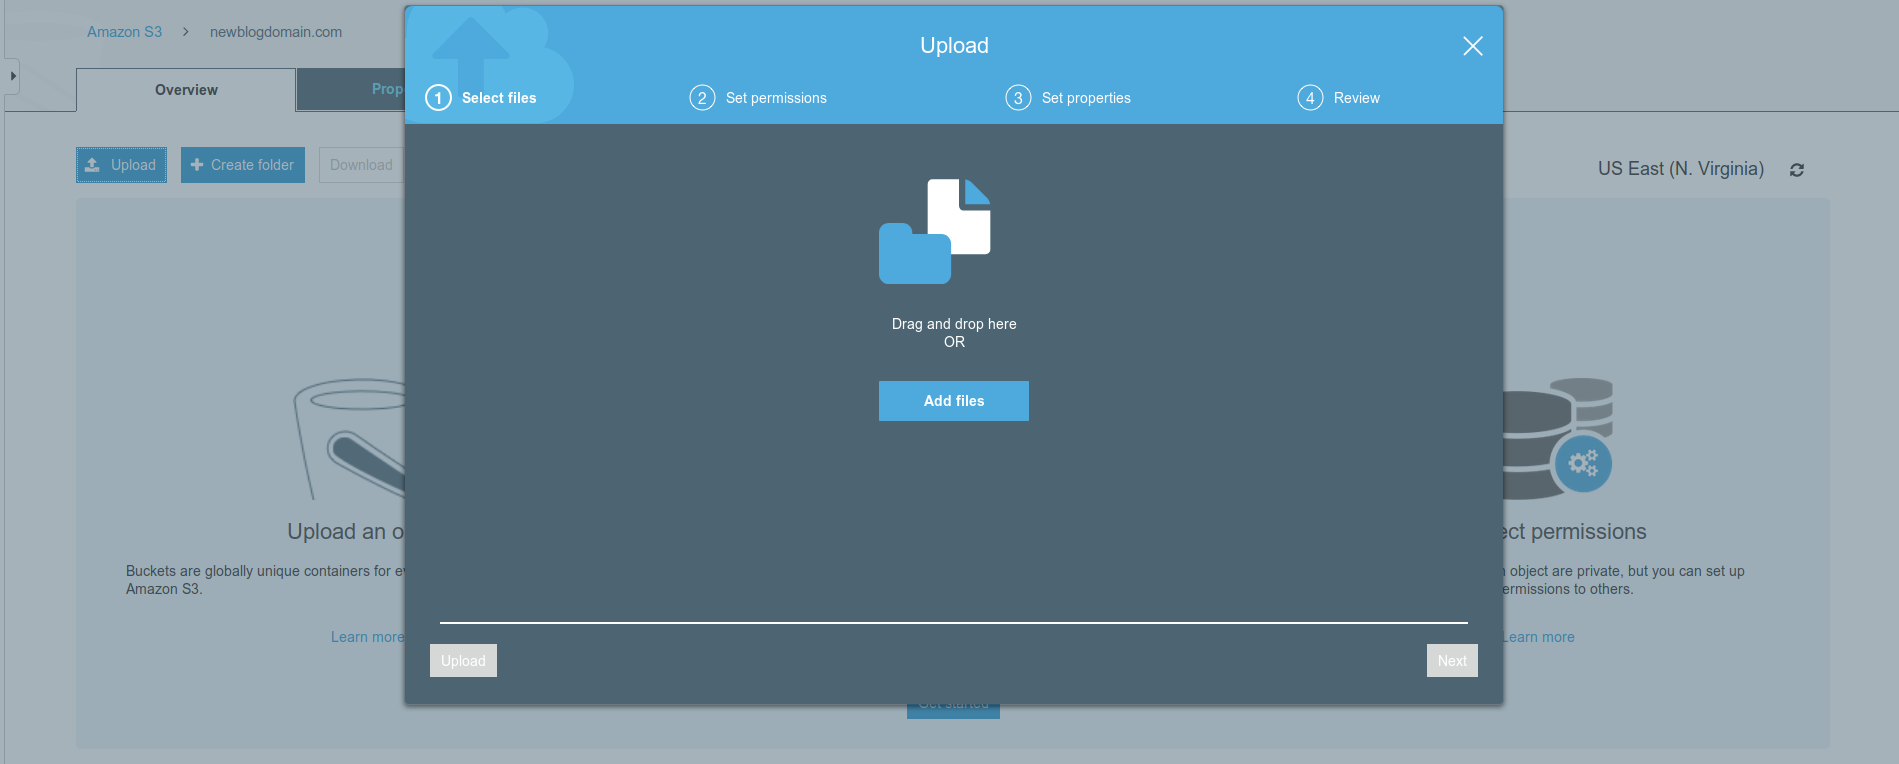
Now switch back to the S3 console, enter your bucket by clicking it’s name and then hit that Upload button. Then click Add files which will open a open-file dialogue window, now navigate to the index.html file and select it, it should now be added to the file overview in the Upload window. All defaults are fine so there’s no need to go through the wizard, just hit Upload and be done with it ;-).
-
After uploading has finished the index.html file is listed in your S3 bucket.
-
Now you can test your webpage by browsing to https://newblogdomain.com with your favorite browser!
As you can imagine uploading your website this way is quite cumbersome, especially when you have frequent updates. In a next blog post I’ll explore the options available within AWS that can ease the process of pushing out updates to S3.
